
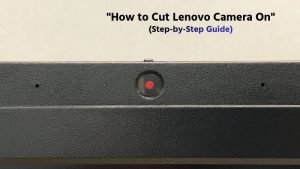
Laptop cameras have become an essential feature for online meetings, video calls, virtual classes, and content creation. Many Lenovo laptop users rely on their built-in webcam every day for platforms like Zoom, Microsoft Teams, or Google Meet.
However, some users often search for how to cut the Lenovo camera on when they want to control their webcam settings, either to turn it on for video calls or manage its privacy and functionality. Understanding how the Lenovo camera works can help you use your laptop more efficiently and avoid common issues.
Lenovo laptops, including popular models like the ThinkPad, IdeaPad, and Yoga series, come with integrated webcams that are designed to be easy to use. But sometimes the camera may not turn on, may stay disabled, or users may not know where to find the correct settings in Windows. Learning how to properly enable or manage the Lenovo camera ensures that your webcam works smoothly whenever you need it.
In this guide, we will explain how to cut the Lenovo camera on, including the steps to enable the webcam, check camera permissions, and troubleshoot common problems on Windows 10 and Windows 11. Whether you are a beginner or an experienced laptop user, this step-by-step guide will help you quickly access and manage your Lenovo laptop camera without any confusion.
How to Cut Lenovo Camera on Windows 10
If you want to cut or disable the Lenovo laptop camera on Windows 10, there are several simple methods you can follow. Many users choose to turn off their webcam to protect their privacy, stop unwanted camera access, or prevent apps from automatically using the camera during meetings or recordings.
Fortunately, Windows 10 provides built-in options that allow you to easily control and manage your Lenovo laptop camera. Below is a step-by-step guide to help you disable the Lenovo camera on Windows 10 safely and quickly.
- Disable Lenovo Camera Using Device Manager
One of the most effective ways to turn off your Lenovo webcam is through Device Manager, which allows you to manage all hardware devices connected to your laptop.
Steps:
- Click the Start Menu on your Windows 10 laptop.
- Type Device Manager in the search bar and open it.
- Look for cameras or imaging devices in the list.
- Click the arrow to expand the section.
- Find the integrated camera or Lenovo camera.
- Right-click on the camera name.
- Select Disable Device.
- Click Yes to confirm.
Once you complete these steps, your Lenovo webcam will be completely disabled and cannot be used by any application until you enable it again.
- Turn Off Camera Access Using Privacy Settings
Windows 10 also allows you to control which apps can access your camera. This method is useful if you want to block camera access without disabling the device completely.
Steps:
- Click the start menu and open settings.
- Select Privacy.
- Click Camera from the left sidebar.
- Find the option. Allow apps to access your camera.
- Turn the toggle off.
After turning this option off, apps like Zoom, Skype, or Teams will no longer be able to use your Lenovo camera.
- Disable the Camera Using Lenovo Vantage
Some Lenovo laptops come with the Lenovo Vantage application, which provides additional device controls, including webcam settings.
Steps:
- Open the Lenovo Vantage app.
- Go to Device Settings.
- Find the camera or privacy mode option.
- Turn the camera off or enable privacy mode.
This option helps you quickly manage your webcam with Lenovo’s built-in system tools.
- Use the Lenovo Camera Privacy Shutter
Many newer Lenovo laptops include a physical privacy shutter next to the webcam. This is one of the simplest ways to block your camera.
Steps:
- Locate the small slider next to your laptop’s webcam.
- Slide it to cover the camera lens.
- When the shutter is closed, the camera is physically blocked.
This method ensures that no app or program can record video, even if the camera software is active.
How to Cut Lenovo Camera on Windows 11
If you want to cut or disable the Lenovo laptop camera on Windows 11, there are several simple methods you can use. Many users prefer to turn off their webcam to protect their privacy, prevent unauthorized access, or stop apps from automatically using the camera.
Windows 11 provides built-in tools that make it easy to control and manage your Lenovo laptop camera settings. Below is a step-by-step guide explaining different ways to disable the Lenovo camera on Windows 11.
- Disable Lenovo Camera Using Device Manager
One of the most effective ways to turn off your Lenovo webcam is through Device Manager, which allows you to control all hardware devices connected to your laptop.
Steps:
- Right-click the Start Menu button.
- Select Device Manager from the menu.
- Find the Cameras section and click the arrow to expand it.
- Locate the integrated camera or Lenovo camera.
- Right-click on the camera device.
- Click Disable Device.
- Confirm by selecting Yes.
After completing these steps, your Lenovo webcam will be fully disabled, and no application will be able to access it until you enable it again.
- Turn Off Camera Access Using Windows 11 Privacy Settings
Windows 11 includes privacy settings that allow you to control which apps can use your camera.
Steps:
- Click the start menu and open settings.
- Select Privacy & Security from the left menu.
- Click Camera under the App Permissions section.
- Turn off the toggle for camera access or let apps access your camera.
This method prevents apps from using the webcam without completely disabling the camera hardware.
- Disable Camera Through Lenovo Vantage
Some Lenovo laptops include the Lenovo Vantage application, which offers additional device and privacy controls.
Steps:
- Open the Lenovo Vantage app from the start menu.
- Navigate to Device Settings.
- Find the camera or privacy mode option.
- Turn privacy mode on or disable the webcam.
This feature allows you to quickly control your camera using Lenovo’s built-in management software.
- Use the Lenovo Physical Camera Privacy Shutter
Many modern Lenovo laptops come with a physical camera privacy shutter located next to the webcam.
Steps:
- Look for the small slider switch near the camera.
- Slide the switch to cover the webcam lens.
- When the shutter is closed, the camera is physically blocked.
This method ensures maximum privacy, because the camera cannot record video even if software tries to access it.
Knowing how to turn the Lenovo camera on in Windows 11 is important for maintaining your privacy and security. Whether you disable the webcam through Device Manager, Windows privacy settings, Lenovo Vantage, or the physical camera shutter, each method allows you to control when your camera is active. If you ever need to use your webcam again for video calls, online meetings, or streaming, you can easily re-enable it in just a few steps.
How to Turn Off Lenovo Laptop Camera in Windows 10
Many Lenovo laptop users prefer to turn off their built-in webcam to improve privacy and prevent unauthorized access. Since webcams can sometimes be activated by apps without your knowledge, disabling the camera when you are not using it is a smart security practice.
Fortunately, Windows 10 provides several easy ways to control or completely disable your Lenovo laptop camera. Below is a step-by-step guide explaining different methods to turn off the Lenovo webcam on Windows 10.
- Turn Off Lenovo Camera Using Device Manager
One of the most reliable ways to disable your Lenovo webcam is through Device Manager, which manages all hardware devices connected to your computer.
Steps:
- Click the Start Menu on your laptop.
- Type Device Manager in the search bar and open it.
- Scroll down and find Cameras or Imaging Devices.
- Click the arrow icon to expand the list.
- Right-click on Integrated Camera or Lenovo Camera.
- Select Disable Device.
- Click Yes to confirm.
After completing these steps, the webcam will be disabled and cannot be used by any application until you enable it again.
- Disable Camera Access from Windows Privacy Settings
If you do not want to completely disable the camera hardware, you can block apps from accessing your webcam through Windows privacy settings.
Steps:
- Open the start menu and click Settings.
- Select Privacy.
- Click Camera from the left sidebar.
- Find the option. Allow apps to access your camera.
- Turn the toggle off.
Once this option is turned off, apps like Zoom, Skype, and Microsoft Teams will no longer be able to use your camera.
- Turn Off the Camera Using Lenovo Vantage
Some Lenovo laptops come with a built-in application called “Lenovo Vantage,” which allows you to manage device settings, including the webcam.
Steps:
- Open the Lenovo Vantage application.
- Go to Device Settings.
- Look for the camera or privacy mode option.
- Enable Privacy Mode or turn off the camera.
This method provides a quick and convenient way to control your webcam directly from Lenovo’s system tools.
- Use the Lenovo Physical Camera Shutter
Many modern Lenovo laptops include a physical camera privacy shutter near the webcam.
Steps:
- Locate the small slider next to your webcam.
- Slide it to cover the camera lens.
- The camera will now be physically blocked.
This is one of the most secure methods, because it prevents any software from accessing the camera.
Turning off the Lenovo laptop camera in Windows 10 is a simple process that helps protect your privacy and improve security. Whether you disable the webcam through Device Manager, Windows privacy settings, Lenovo Vantage, or a physical shutter, each method ensures that your camera remains off when you don’t need it.
How to Disable Lenovo Webcam on Windows 11 Laptop
The built-in webcam on a Lenovo laptop is useful for video calls, online meetings, and virtual classes. However, many users prefer to disable their webcam when it is not in use to protect their privacy and prevent unauthorized access.
Windows 11 makes it easy to control your webcam settings, allowing you to disable the camera completely or restrict which apps can use it. Below is a step-by-step guide explaining how to disable the Lenovo webcam on a Windows 11 laptop using different methods.
- Disable Lenovo Webcam Using Device Manager
The most common and effective way to disable your Lenovo webcam is through Device Manager, which allows you to manage hardware devices connected to your laptop.
Step-by-Step Instructions:
- Right-click the Start Menu button.
- Select Device Manager from the list.
- Scroll down and find the Cameras section.
- Click the arrow to expand the category.
- Locate the integrated camera or Lenovo webcam.
- Right-click the camera device.
- Click Disable Device.
- Confirm the action by selecting Yes.
After completing these steps, your webcam will be fully disabled, and no applications will be able to access it until you enable it again.
- Turn Off Webcam Access in Windows 11 Privacy Settings
Windows 11 includes privacy controls that allow you to block apps from accessing your webcam.
Step-by-Step Instructions:
- Click the start menu and open settings.
- Select Privacy & Security from the left menu.
- Click Camera under App Permissions.
- Turn off camera access or disable it. Let apps access your camera.
This method does not disable the hardware but prevents apps from using the camera.
- Disable the Webcam Using Lenovo Vantage
Some Lenovo laptops come with the Lenovo Vantage application, which allows you to manage hardware settings and privacy features.
Steps:
- Open Lenovo Vantage from the start menu.
- Go to Device Settings.
- Find the camera or privacy mode option.
- Turn on Privacy Mode to disable the webcam.
This feature provides a quick way to control your webcam directly through Lenovo’s built-in software.
- Use the Lenovo Physical Camera Privacy Shutter
Many modern Lenovo laptops include a physical camera privacy shutter next to the webcam.
Steps:
- Locate the small slider switch near the camera.
- Slide the switch to cover the webcam lens.
- Once the shutter is closed, the camera is physically blocked.
This method ensures maximum privacy, as the camera cannot record even if software tries to access it.
Learning how to disable the Lenovo webcam on a Windows 11 laptop is important for maintaining your online privacy and security. Whether you disable the webcam through Device Manager, Windows privacy settings, Lenovo Vantage, or the physical shutter, each method gives you full control over your laptop camera.
How to Stop Lenovo Laptop Camera from Turning On Automatically
If your Lenovo laptop camera turns on automatically, it can be frustrating and may raise privacy concerns. This usually happens when certain apps have permission to access your webcam or when background applications automatically activate the camera.
- Turn Off Camera Access for Apps
Sometimes apps like Zoom, Skype, Microsoft Teams, or browsers can automatically access your webcam. You can stop this by disabling camera permissions.
Steps:
- Open the start menu and click Settings.
- Go to Privacy (Windows 10) or Privacy & Security (Windows 11).
- Click Camera in the left sidebar.
- Turn off Allow apps to access your camera.
- You can also disable access for specific apps instead of turning it off completely.
- Check Running Applications
Certain programs may run in the background and activate your webcam automatically.
Steps:
- Press Ctrl + Shift + Esc to open Task Manager.
- Look for apps that may use the camera (Zoom, Skype, Teams, etc.).
- Select the application.
- Click End Task if it is running unnecessarily.
This helps prevent apps from activating your webcam without your permission.
- Disable the Camera in Device Manager
If you want to completely stop the camera from turning on, you can disable it from Device Manager.
Steps:
- Right-click the start menu.
- Select Device Manager.
- Expand the Cameras or Imaging Devices section.
- Right-click Integrated Camera.
- Select Disable Device.
This will fully disable the webcam until you enable it again.
- Use Lenovo Vantage Privacy Mode
Many Lenovo laptops include a feature called Privacy Mode in the Lenovo Vantage application.
Steps:
- Open Lenovo Vantage.
- Go to Device Settings.
- Find Camera Settings.
- Turn on Privacy Mode.
This feature prevents applications from activating your camera automatically.
- Use the Lenovo camera privacy shutter.
Some Lenovo laptops include a physical camera shutter for additional privacy.
Steps:
- Locate the small slider next to the webcam.
- Slide it to cover the camera lens.
This physically blocks the camera and ensures that no app can use it.
If your Lenovo laptop camera keeps turning on automatically, adjusting your app permissions, background applications, and privacy settings can quickly solve the problem. You can also disable the webcam entirely or use Lenovo’s privacy shutter for maximum security. By managing these settings, you can ensure that your laptop camera only turns on when you intentionally use it.
How to Stop Apps from Using Camera on Lenovo Laptop
Many Lenovo laptop users want to control which apps can access their camera to protect their privacy and security. Some applications, such as video conferencing tools or browsers, may automatically request camera access. If you don’t want apps to use your webcam without permission, Windows allows you to easily manage or block camera access through privacy settings.
- Stop Apps from Using Camera in Windows Privacy Settings
Windows provides built-in privacy settings that allow you to control which apps can access your camera.
Step-by-Step Instructions (Windows 10):
- Click the start menu and open settings.
- Select Privacy.
- Click Camera from the left sidebar.
- Find the option. Allow apps to access your camera.
- Turn the toggle off to block all apps from using the camera.
You can also scroll down and disable camera access for specific apps instead of blocking them all.
- Manage Camera Access in Windows 11
If you are using Windows 11, the camera permission settings are located under Privacy & Security.
Step-by-Step Instructions:
- Open the start menu and click Settings.
- Select Privacy & Security.
- Click Camera under App Permissions.
- Turn off camera access or disable camera permissions for individual apps.
This ensures that only the apps you trust can use the webcam.
- Disable Camera Access for Desktop Applications
Some desktop programs may still access your webcam even if app permissions are limited.
Steps:
- Go to Settings.
- Click Privacy or Privacy & Security.
- Select Camera.
- Turn off Allow desktop apps to access your camera.
This will prevent traditional desktop software from activating your webcam.
- Disable the Webcam Completely Using Device Manager
If you want to ensure that no application can use the camera, you can disable the webcam entirely.
Steps:
- Right-click the start menu.
- Select Device Manager.
- Expand the Cameras or Imaging Devices section.
- Right-click Integrated Camera.
- Select Disable Device.
This will stop all apps from using your Lenovo camera until it is enabled again. Knowing how to stop apps from using the camera on a Lenovo laptop is important for maintaining your privacy and security. By managing camera permissions through Windows privacy settings, app permissions, or Device Manager, you can ensure that your webcam is only used when you allow it.
How to Fix Inverted Camera on Lenovo Laptop
If your Lenovo laptop camera appears upside down or inverted, it can make video calls, streaming, or recordings frustrating. This is a common issue on Lenovo laptops, especially ThinkPad or IdeaPad models, and usually happens due to driver issues, camera settings, or Windows orientation conflicts. Fortunately, it’s easy to fix.
- Restart the camera app or video call software.
Sometimes the inverted image is caused by a temporary glitch in the camera app or video call software.
Steps:
- Close your camera app or video call program (Zoom, Teams, Skype).
- Reopen the app and check if the camera orientation is correct.
- Test the camera in another application to see if the issue persists.
- Often, a simple restart of the software resolves temporary glitches.
- Update or Reinstall the Camera Driver
Outdated or corrupted drivers often cause the camera to display inverted images.
Steps:
- Right-click the start menu and select Device Manager.
- Expand the Cameras or Imaging Devices section.
- Right-click your Lenovo Integrated Camera.
- Select Update driver → Search automatically for drivers.
- If no updates are found, you can also select Uninstall device, then restart your laptop.
- Windows will automatically reinstall the default camera driver.
- Updating or reinstalling the driver often corrects the camera orientation.
- Adjust Camera Settings
Some Lenovo laptops allow you to manually rotate or flip the camera through settings.
Steps:
- Open the Camera app on Windows.
- Click the gear icon (Settings) in the app.
- Look for options like “mirror,” “rotate,” or “flip.”
- Adjust the setting until the image appears correctly.
Some webcams have built-in orientation options in the app itself.
- Check Video Conferencing Software Settings
If the camera appears inverted only in certain apps, the problem may be app-specific.
Steps:
- Open your video conferencing software (Zoom, Teams, etc.).
- Go to Video Settings.
- Look for the Rotate, Flip, or Mirror My Video options.
- Adjust the settings to correct the orientation.
Many apps have independent camera settings separate from Windows.
- Update Windows 10 or 11
Sometimes a Windows update can fix underlying system issues affecting your camera.
Steps:
- Open Settings → Update & Security → Windows Update.
- Click Check for Updates.
- Install any pending updates and restart your laptop.
- Keeping Windows updated ensures compatibility with drivers and apps.
An inverted Lenovo laptop camera is usually caused by driver issues, app settings, or system glitches. By updating your drivers, checking camera settings, and adjusting video conferencing software options, you can quickly fix the problem. If the issue persists, a Windows update or reinstalling the camera driver often solves the orientation problem permanently.
FAQs
What does “cut Lenovo camera on” mean?
It usually refers to turning on or off the Lenovo laptop camera. Users may want to enable it for video calls or disable it for privacy.
Is there a physical switch to cut the Lenovo camera?
Some Lenovo laptops include a physical camera shutter. Sliding it blocks the lens, providing an easy way to cut the camera off physically.
Does cutting the Lenovo camera affect video calls?
Yes. If the camera is disabled or blocked, apps like Zoom, Teams, or Skype won’t be able to use the webcam until it’s turned back on.
Can I cut the Lenovo camera without uninstalling drivers?
Yes. Disabling the camera through Device Manager or Lenovo Vantage Privacy Mode does not uninstall drivers and is reversible.
Is it safe to cut the Lenovo camera on for privacy?
Absolutely. Using Device Manager, privacy settings, Lenovo Vantage, or the physical shutter ensures your camera is only active when you allow it, protecting your privacy.
Does Lenovo Vantage automatically cut the camera for me?
Only if Privacy Mode is enabled. Otherwise, you need to manually enable or disable the camera using Lenovo Vantage or Windows settings.
Can I schedule when the Lenovo camera is on or off?
Windows 10/11 does not provide a built-in scheduling feature, but you can use third-party apps to automate enabling/disabling the camera if needed.
Conclusion
Managing your Lenovo laptop camera is essential for maintaining privacy, security, and control over app access. Whether you want to cut the camera on or off, Windows 10 and 11 provide multiple easy options, including Device Manager, privacy settings, Lenovo Vantage, and physical camera shutters.
By following the step-by-step methods outlined in this guide, you can ensure that your webcam only activates when you want it to, preventing unauthorized access and protecting sensitive information.
From temporary disabling for casual use to permanently cutting the camera for maximum security, Lenovo laptops offer flexible tools to suit every user’s needs. With these settings, you can confidently manage your webcam for video calls, online meetings, or streaming while keeping your personal privacy intact.
Recent Posts
Parts of a 35mm Camera: Complete Guide to Every Key Part and Its Function
Learn the parts of a 35mm camera, what each part does, and how the lens, shutter, film chamber, viewfinder, and controls work together.
Parts of a Camera Canon: A Complete Guide to Canon Camera Parts and Functions
Learn the parts of a Canon camera, what each part does, and how the lens, sensor, shutter, controls, viewfinder, and screen work together.