VRChat has become one of the most popular social VR platforms, allowing players to interact, socialize, and explore virtual worlds using immersive avatars. While the platform offers a lot of freedom, many users struggle with camera angles and perspectives, especially when switching between first-person and third-person views.
Understanding how to change camera perspective in VRChat is crucial for improving your experience, whether you’re streaming gameplay, recording videos, or simply exploring VR worlds. Proper camera control not only enhances your visibility but also ensures smoother navigation and better interaction with other players.
In this guide, we will walk you through step-by-step instructions to adjust your camera, whether you’re playing on PC or VR mode, and share tips to optimize camera settings for recording, streaming, or everyday gameplay.
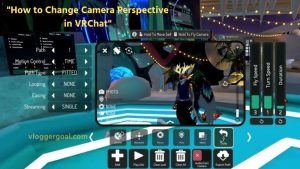
How to Change Camera Perspective in VRChat -Easy Step
VRChat is one of the most immersive social VR platforms, allowing players to explore virtual worlds, interact with avatars, and create unique content. While the gameplay is exciting, controlling the camera perspective is crucial for a smooth and enjoyable experience. Whether you want to switch between first-person and third-person views, adjust angles, or zoom for screenshots, proper camera control makes a big difference.
- Switch Between First-Person and Third-Person Camera
VRChat lets you toggle between two main perspectives:
Open VRChat and enter a world.
- On PC, press the Esc key to open the menu. On VR, open the VR menu using your controller.
- Navigate to Settings → Camera or View Mode.
- Select First-Person for an immersive avatar view or Third-Person to see your avatar fully.
Pro Tip: Third-person perspective is perfect for streaming, recording, or taking screenshots, while first-person gives a more immersive VR experience.
- Rotate the Camera Around Your Avatar
- PC: Hold the right mouse button and move your mouse to rotate the camera.
- VR: Use the right joystick on your controller to rotate the camera view.
- Adjust until you get the best angle for your avatar or environment.
- Rotating the camera is helpful in crowded worlds or when you want to frame the perfect shot.
- Zoom the Camera In and Out
- PC: Use your mouse scroll wheel to zoom closer or further away.
- VR: Use the thumbstick or headset controls if available.
Zooming allows you to focus on details or capture wider surroundings when recording or streaming.
- Adjust Camera Height and Distance
- Go to Settings → Camera.
- Use the distance slider to move the camera closer to or further from your avatar.
- Adjust the height slider to set the camera at your preferred viewpoint.
Proper height and distance adjustment ensures your avatar remains visible while maintaining a natural field of view.
- Reset Camera Position
- Sometimes the camera may become inverted, off-center, or misaligned.
- Open Settings → Camera → Reset Camera.
- The camera will return to the default position and perspective.
- This is especially useful when switching worlds or after extensive movement in VR.
- VR Headset Camera Controls
For VR users:
- Rotate Camera: Use the right joystick to rotate around your avatar.
- Zoom In/Out: Adjust the view distance using VRChat settings.
- Switch Perspectives: Use the VR menu to toggle between first-person and third-person modes.
VR mode gives an immersive first-person experience, but third-person can still be used for recording or content creation.
- Additional Tips for Better Camera Control
- Check world-specific settings: Some worlds may override default camera positions.
- Use reset shortcut frequently: Press Esc → Camera → Reset if the view gets stuck.
- Combine rotation, zoom, and height adjustments: This creates the perfect perspective for streaming, screenshots, or video recordings.
- Experiment with FOV (Field of View): Adjusting FOV can make the environment feel more natural and less cramped.
Mastering the camera perspective in VRChat is essential for an enjoyable and immersive experience. Whether you’re exploring worlds, interacting with friends, or creating content, adjusting first-person, third-person, zoom, rotation, and height settings gives you full control over your view. By following this step-by-step guide, you can customize the camera for PC or VR, capture perfect angles, and enhance your VRChat experience.
How to Change Camera Perspective During VRChat Recording
Recording in VRChat is popular among content creators, streamers, and YouTubers. However, the default camera perspective may not always capture your avatar or environment the way you want. Knowing how to change camera perspective during recording ensures your videos look professional and immersive.
- Switch Between First-Person and Third-Person View While Recording
- Open VRChat and start recording using OBS, Shadowplay, or VRChat’s recording tools.
- Press Esc (PC) or open the VR menu on your headset.
- Go to Settings → Camera → Camera Perspective.
- Choose first-person to capture your point of view or third-person to show your full avatar.
Pro Tip: Third-person perspective is ideal for storytelling and showing interactions with other avatars during recording.
- Rotate the Camera
- PC Users: Hold the right mouse button and move your mouse to rotate the camera around your avatar.
- VR Users: Use the right joystick on the controller to rotate the camera.
- Adjust the angle to frame your avatar or environment properly for recording.
- Rotating the camera while recording allows you to capture dynamic scenes and cinematic shots.
- Zoom In and Out During Recording
- PC Users: Use the mouse scroll wheel to zoom the camera in or out.
- VR Users: Adjust the zoom using controller sliders or headset FOV settings.
- Zooming helps focus on specific avatars, objects, or areas for a more professional-looking video.
- Adjust Camera Distance and Height
- Open Settings → Camera.
- Move the distance slider to bring the camera closer or farther from your avatar.
- Adjust the height slider to set the optimal viewpoint.
Proper distance and height adjustments make your recording look natural and prevent awkward framing.
- Reset Camera If Needed
If the camera view becomes inverted, misaligned, or awkward:
- Press Esc → Settings → Camera → Reset Camera.
- The camera will return to the default position.
Resetting during recording ensures you can quickly correct any perspective errors without stopping your session.
- VR Headset Recording Tips
- Rotate Camera: Use the right joystick to adjust angles while recording.
- Switch Perspectives: Use the VR menu to toggle between first-person and third-person modes.
- Zoom and Distance: Adjust via VRChat settings or in-app camera sliders.
In VR mode, first-person gives an immersive feel, while third-person is great for cinematic or tutorial videos.
- Additional Tips for High-Quality VRChat Recording
- Plan camera angles before recording: Choose first-person or third-person based on the scene.
- Combine rotation, zoom, and height adjustments for cinematic shots.
- Use reset shortcuts to avoid disorienting perspectives.
- Check FOV (Field of View) settings to prevent distortion in recordings.
- Consider external recording tools like OBS or Shadowplay for smoother frame rates.
Changing the camera perspective during VRChat recording is key to producing professional, engaging, and immersive videos. By mastering first-person and third-person modes, adjusting rotation, zoom, height, and distance, you can capture dynamic scenes and avatar interactions like a pro.
How to Change VRChat Camera While In-Game
Changing your camera perspective in VRChat can completely transform your gameplay and recording experience. Whether you’re a VR user or playing on a desktop, VRChat provides several camera modes to help you capture your adventures from unique angles. Here’s how to do it.
- Open the quick menu.
While in-game, press the Esc key on your keyboard (or menu button on VR controllers) to open the quick menu. This menu allows you to access camera options, settings, and other in-game controls.
- Access Camera Settings
Navigate to Settings > Camera. Here, you’ll find multiple camera modes that VRChat supports, including First Person, Third Person, and Free Camera. Each mode provides a different perspective:
- First Person – Standard player view; perfect for immersive VR experiences.
- Third Person—Lets you see your avatar from behind, ideal for recording or screenshots.
- Free Camera – Unlocks the camera, allowing you to move it independently of your avatar.
- Switch Camera Modes
Click or select the camera mode you want to use. If you’re on PC:
- F6 – Switches between first and third-person views.
- F7 – Enables free camera mode for dynamic shots.
In VR, you may need to toggle using the controller buttons as mapped in your VRChat settings.
- Adjust Camera Position and Angle
Once in free camera mode, you can use the keyboard or VR controls to move and rotate the camera:
- W, A, S, D – Move camera forward, left, backward, and right.
- Mouse movement / Right thumbstick – Rotate the camera freely.
- Q / E keys – Move camera up and down for vertical positioning.
This gives you cinematic control over what you want to capture in your screenshots or recordings.
- Lock Camera on Avatar (Optional)
If you want your camera to follow your avatar while recording, toggle the Follow Avatar option in camera settings. This ensures your camera maintains a consistent angle and distance, perfect for smooth video captures.
- Save Your Camera Settings
After adjusting, make sure to save your camera configuration so that VRChat remembers your preferred angles the next time you log in. This is especially useful for streamers or content creators.
- Start Recording or Take Screenshots
Now that your camera is positioned perfectly, use VRChat’s built-in screenshot tool (F8) or external recording software to capture your adventures in style.
Tips for Better Camera Control in VRChat
- Experiment with camera smoothing in settings to reduce jitter in free camera mode.
- Use third-person mode for avatar showcases or dance animations.
- Remember that camera controls may differ slightly depending on VR headset or desktop settings.
Changing your camera perspective in VRChat is simple but opens up endless creative possibilities. By mastering first-person, third-person, and free camera modes, you can capture immersive gameplay, create cinematic videos, and showcase your avatar in style.
How to Switch from First-Person to Third-Person in VRChat
VRChat is a social VR platform where users can explore virtual worlds, meet friends, and showcase their avatars. By default, VRChat starts in first-person view, giving you an immersive experience as if you are inside your avatar. While this view is great for exploration and VR immersion, it doesn’t always let you show off your avatar or capture cinematic videos.
That’s where the third-person view comes in; it allows you to see your entire avatar from behind, making it perfect for recording, taking screenshots, or simply enjoying a broader perspective of your surroundings.
Switching between first-person and third-person is quick and easy, whether you are playing on PC or using a VR headset.
Switching on PC (Desktop Mode)
- Press F6—this keyboard shortcut toggles between first-person and third-person views.
- Rotate the camera—Use your mouse to rotate the camera around your avatar for the best angle.
- Zoom In or Out – Scroll your mouse wheel to adjust the distance between the camera and your avatar.
Switching in VR Mode
- Open the Quick Menu – Press the menu button on your VR controller.
- Navigate to Settings > Camera – Find the camera mode options in the menu.
- Select Third-Person Mode – Your view will switch, allowing you to see your avatar from behind.
- Adjust the Camera—Depending on your VR headset, you can slightly move or rotate the camera for the ideal perspective.
Tips for Using Third-Person View
- Use a third-person view for avatar showcases, dance animations, or recording videos.
- You can switch back to first-person anytime to get a more immersive VR experience.
- On PC, try Free Camera mode (F7) for more cinematic shots beyond the standard third-person view.
Switching from first-person to third-person in VRChat is simple but enhances your social and creative experience. By mastering these camera views, you can enjoy immersive gameplay while also showcasing your avatar in the most flattering angles for screenshots and videos.
How to Adjust Camera Angle in VRChat VR Mode
In VRChat, your camera determines how you see the world and how others see your avatar in recordings or screenshots. While first-person view gives an immersive perspective, adjusting the camera angle in VR mode allows you to capture cinematic shots, showcase your avatar, or simply get a better view of your surroundings.
Unlike desktop mode, VR mode offers slightly different controls, but with practice, you can move, rotate, and position your camera freely for the perfect angle.
Step 1: Enter Free Camera or Third-Person Mode
- Open the Quick Menu by pressing the menu button on your VR controller.
- Navigate to Settings > Camera.
- Select Third-Person or Free Camera mode.
- Third-Person—The camera follows your avatar automatically but allows minor rotation.
- Free Camera – Camera can move independently of your avatar for full control.
Step 2: Rotate the Camera
- Use your right thumbstick to rotate the camera around your avatar.
- You can adjust horizontally (yaw) and vertically (pitch) to frame the shot perfectly.
Step 3: Move the Camera
In Free Camera mode, you can move the camera independently:
- Left thumbstick – Moves the camera forward, backward, left, or right.
- Grip or trigger buttons – Some VR setups allow vertical movement, letting you raise or lower the camera.
Step 4: Zoom or Adjust Distance
- In VR, zoom is usually done by moving the camera physically closer or farther from your avatar using the movement controls.
- Some VR systems allow subtle scaling using the controller’s secondary buttons.
Step 5: Lock or Follow Your Avatar (Optional)
- For smoother recordings, toggle Follow Avatar in the camera settings.
- This keeps your camera locked on your avatar while still allowing small adjustments to angle and rotation.
Adjusting the camera angle in VRChat VR mode gives you the freedom to capture your virtual world from any perspective. Whether you’re recording content, taking screenshots, or just exploring, mastering camera rotation, movement, and zoom in VR mode will make your experience more immersive and visually impressive.
How to Adjust Camera Sensitivity in VRChat
Camera sensitivity in VRChat determines how quickly your camera moves or rotates when you use your mouse or VR controller. Adjusting it properly can make your experience smoother, whether you’re exploring, recording, or streaming.
Too high sensitivity can make the camera feel jerky, while too low sensitivity may feel sluggish. Here’s how beginners and experienced users can fine-tune their camera settings for the best experience.
- Access Camera Settings
- Open the quick menu.
- PC: Press the Esc key.
- VR: Press the menu button on your VR controller.
- Navigate to Settings > Camera.
- Adjust Camera Sensitivity on PC
- Look for the Camera Sensitivity or Mouse Sensitivity slider.
- Lower Value: Slower, smoother camera movement — ideal for precise recording or content creation.
- Higher Value: Faster rotation — better for quick navigation or exploration.
- Adjust incrementally to find a comfortable balance.
- Adjust Camera Sensitivity in VR
- VRChat typically uses the thumbstick rotation speed as camera sensitivity.
- Go to Quick Menu > Settings > Camera, then adjust the rotation sensitivity slider.
- Test by moving the camera in different directions to ensure smooth control without over-rotating.
- Fine-Tune for Third-Person and Free Camera
- Third-Person Mode: Lower sensitivity can help keep your avatar centered and avoid jittery movements.
- Free Camera Mode: Moderate sensitivity allows smooth exploration of the environment without disorienting movement.
- Test Your Settings
- Walk around your world or rotate your avatar while testing sensitivity.
- Make small adjustments until movement feels natural for your play style.
Tips
- Combine sensitivity adjustments with smooth camera movement settings in VRChat for better results.
- If recording or streaming, slightly lower sensitivity ensures stable, cinematic shots.
- Remember to save your settings so you don’t have to readjust each session.
Adjusting camera sensitivity in VRChat is key to a comfortable and immersive experience. By finding the right balance for mouse or controller rotation, you can navigate worlds, record videos, and stream smoothly without frustration.
VRChat Camera Perspective Settings for Beginners
When you first enter VRChat, understanding camera perspectives can feel a bit overwhelming. The camera determines not only what you see in-game but also how your avatar appears in recordings or screenshots. For beginners, mastering the basic camera settings can greatly enhance both your VR experience and content creation.
VRChat provides three main camera perspectives: first-person, third-person, and free camera. Each has its unique purpose and benefits.
- First-Person View (Default Perspective)
- Description: This is the standard camera view where you see the world through your avatar’s eyes.
- Best For: Immersive exploration and social interactions in VRChat.
Tips:
- Ideal for chatting and navigating the world naturally.
- Limited for recording videos or showcasing your avatar since your full body is not visible.
- Third-Person View
- Description: Shows your avatar from behind, allowing you to see your full character and surroundings.
- Best For: Taking screenshots, recording videos, or performing dances and animations.
How to Switch:
- PC: Press F6 to toggle between first-person and third-person.
- VR: Open the Quick Menu > Settings > Camera > Third-Person Mode.
Tips:
- Rotate the camera around your avatar using your mouse or right thumbstick.
- Adjust the distance to frame your avatar perfectly.
- Free Camera Mode
- Description: Lets you move the camera independently of your avatar, giving full control over angles and perspectives.
- Best For: Cinematic recordings, exploring worlds from unique angles, or creating content.
How to Activate:
- PC: Press F 7.
- VR: Quick Menu > Settings > Camera > Free Camera.
Tips:
- Move the camera smoothly to avoid shaky footage.
- Combine rotation, height, and distance adjustments for dynamic shots.
- Camera Rotation and Zoom
- Rotate: Use the mouse (PC) or right thumbstick (VR) to spin the camera around your avatar.
- Zoom: Scroll the mouse wheel (PC) or move the camera closer/farther (VR) for optimal framing.
- Height Adjustment: Some VR setups allow vertical camera movement to capture cinematic angles.
- Follow Avatar Option
- This option keeps your camera focused on your avatar automatically, perfect for recording performances or movements without manual adjustments.
Tips for Beginners
- Start with first-person to get comfortable navigating VRChat.
- Use third-person to showcase your avatar or take screenshots.
- Explore the free camera when ready for cinematic shots and recordings.
- Smooth camera movements make recordings and streams look more professional.
- Experiment with camera height, rotation, and zoom to capture the perfect shot.
Understanding VRChat camera perspectives is essential for both beginners and content creators. By mastering first-person, third-person, and free camera modes, you can enjoy immersive VR gameplay while capturing screenshots and videos from the perfect angles
VRChat Camera Settings for Better Streaming
Streaming in VRChat is all about giving your audience the best view of your avatar, actions, and the virtual world around you. Proper camera settings can make your stream more engaging, cinematic, and professional-looking. Whether you’re a beginner or a seasoned streamer, knowing how to adjust VRChat’s camera can dramatically improve your content quality.
- Use Third-Person or Free Camera
- Third-Person View: Shows your full avatar, ideal for dancing, gestures, or avatar showcases.
- Free Camera Mode: Gives you complete control over camera positioning and angles, allowing cinematic shots.
How to Enable:
- PC: Press F6 for third-person and F7 for free camera.
- VR: Open Quick Menu > Settings > Camera, then select the desired mode.
- Adjust Camera Distance and Height
- Position your camera so your avatar is fully visible and centered in the frame.
- Zoom in/out using the mouse wheel (PC) or controller movement (VR) to avoid clipping or awkward angles.
- Raise or lower the camera to maintain a dynamic perspective that keeps viewers engaged.
- Smooth Camera Movements
- Sudden or jerky camera movements can be distracting for viewers.
- In Free Camera Mode, move the camera gradually and use smooth rotations around your avatar.
- Adjust camera follow settings so it follows your avatar smoothly when you’re walking or performing actions.
- Optimize Field of View (FOV)
- A slightly wider FOV allows more of your avatar and surroundings to appear on screen.
- Avoid extremely wide or narrow FOVs, as they can distort the view or make your avatar too small.
- Lock Camera on Avatar for Key Shots
- Use the Follow Avatar feature when recording dances, animations, or movement-heavy content.
- This ensures your avatar stays centered while allowing minor camera angle adjustments for cinematic effect.
- Lighting and Background
- Position your avatar in well-lit areas of the world to avoid shadows or dark spots on stream.
- Free Camera allows you to frame your avatar against visually appealing backgrounds, enhancing stream aesthetics.
- Test Before Going Live
- Always do a test stream to check camera angles, zoom, and follow settings.
- Adjust positioning to avoid clipping into objects, awkward framing, or sudden obstructions during live gameplay.
Optimizing your VRChat camera for streaming ensures your viewers see the best version of your avatar and virtual environment. By using third-person or free camera modes, smoothing camera movements, and adjusting FOV and angles, you can create engaging, cinematic streams that captivate your audience.
FAQs
What are the different camera perspectives in VRChat?
VRChat offers first-person, third-person, and free camera modes. First-person is immersive, third-person shows your full avatar, and the free camera allows independent movement for cinematic shots.
How do I switch from first-person to third-person on PC?
On PC, simply press F6 to toggle between first-person and third-person views.
How can I switch camera perspectives in VR mode?
Open the Quick Menu > Settings > Camera, then select your desired perspective: first-person, third-person, or free camera.
What is free camera mode in VRChat?
Free camera mode allows your camera to move independently of your avatar, giving you full control over angles and cinematic shots. On PC, press F7 to enable it.
How do I keep the camera focused on my avatar?
Enable the Follow Avatar option in camera settings. This keeps your camera centered on your avatar while moving.
Can I switch perspectives during animations or dances?
Yes, VRChat allows you to switch camera modes at any time, even during dances or avatar animations, to capture the perfect shot.
Conclusion
Mastering camera perspective in VRChat opens up a whole new level of immersion and creativity. Whether you’re streaming, recording, or simply exploring virtual worlds, adjusting your camera settings allows you to capture the perfect angles, highlight your avatar’s expressions, and create engaging content for your audience.
By understanding the different camera modes, zoom levels, and perspective options, you gain full control over how you experience VRChat. Remember, experimentation is key—don’t hesitate to tweak the settings until you find the view that best suits your style.
With these tips and techniques, you’re now equipped to make your VRChat adventures visually dynamic and truly personalized. So go ahead, adjust your perspective, and bring your virtual presence to life like never before!
Recent Posts
In today’s content-driven world, having a reliable video camera is essential for creators, vloggers, and everyday users who want to capture high-quality footage without complicated setups. The CS-8...
When it comes to mirrorless and compact cameras, Fujifilm has consistently been at the forefront of innovation, blending exceptional image quality with stylish design and intuitive...