
Proper formatting protocols are necessary for SD cards used as camera storage to function properly. To improve system performance, the formatting procedure eliminates possible faults and makes devices compatible.
Along with step-by-step directions and troubleshooting tips particular to cameras, the following guide explains How to Format SD Card Camera.
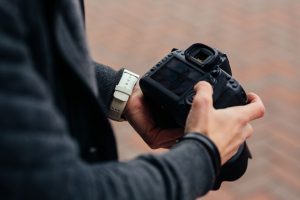
Here is a detailed, step-by-step guide on how to format SD card in a camera.
Important: Back Up Your Files First!
Before you begin, it is crucial to understand what formatting does. Formatting an SD card will permanently erase all data on it, including photos, videos, and other files. This process is irreversible, so you MUST transfer any files you want to keep to a computer or another storage device before you format the card.
Why Format in the Camera?
While you can format SD card on a computer, it is highly recommended to do it in the camera you will be using it with. This is because
Optimal Compatibility: Formatting the card in the camera ensures that the card is set up with the correct file system and folder structure that is optimized for that specific camera model. This helps prevent errors and ensures smooth performance.
Performance: It can help maintain optimal read/write speeds, reducing the risk of recording failures or slow performance.
Error Prevention: It can resolve issues and corruption that may have built up over time from a card being used in multiple devices or from improper removal.
How to Format SD Card Camera?
The exact steps and menu names may vary slightly depending on your camera brand and model (e.g., Canon, Nikon, Sony, etc.). However, the general process is very similar across most modern digital cameras.
- Insert the Format SD Card card into the camera’s memory card slot. Make sure it is inserted correctly.
- Turn on the camera.
- Access the menu. Press the “Menu” button on your camera.
- Navigate to the Setup/Wrench Menu. Use the camera’s directional buttons, control wheel, or touchscreen to find the “Setup” menu, which is often represented by a wrench or gear icon.
- Find the “Format” option. In the setup menu, look for an option like “Format,” “Format Card,” “Format Memory Card,” or “Initialize.”
- Select the card to format. If your camera has multiple card slots, you may need to select the specific slot you want to format (e.g., Slot 1 or Slot 2).
- Confirm the action. The camera will display a warning message asking for confirmation, like “Format memory card? All data will be deleted.” From the options displayed on the screen, choose “OK,” “Yes,” or “Enter.”
- Wait for the process to complete. The camera will show a progress indicator or a message like “Formatting memory card.” Do not turn off the camera or remove the card during this process.
- Formatting is complete. The camera will signal when the procedure is complete. At this point, you can either switch off the camera or begin shooting.
Specific Brand Examples
Here are some common examples for different camera brands:
How to Format SD Card in Camera—Nikon
- Press the MENU button.
- Go to the Setup Menu
- Select “Format Memory Card.”
- Select “Yes” to confirm the action.
On some Nikon models, there is a “two-button format” shortcut. You can press and hold the “Delete” (trash can) and “Menu” buttons simultaneously for a few seconds to quickly access the format option.
How to Format SD Card in Camera—Reolink
The simplest method for formatting your Format SD Card if you have a Reolink security camera is to utilize the Reolink app on your smartphone and follow the instructions below.
1. To access the camera settings, launch the Reolink app.
Launch the Reolink app on your mobile device. Once you have chosen the camera whose SD card you want to format, press the “Gear icon” button. After tapping “Device Information,” choose “Storage” from this menu.
2. Select and format your SD card.
In the “storage” area, pick your SD card, select “Format,” and then select “OK.” The SD card will be formatted, and the camera will resume in a few minutes.
How to Format SD Card in Camera—Sony
- Press the MENU button.
- Go to the gear or camera icon to access the Setup or Shooting menu.
- Look for “Format” or “Media.”
- Select the desired memory card slot.
- Select “Enter” to perform a quick format. If you press the “Delete” button, you may get a prompt for “full formatting,” which is more thorough.
Quick vs. Low-Level (Full) Format
When formatting, some cameras offer two options:
Quick Format: This is the faster option. It deletes the file allocation table, making the space available for new files to be written over the old data. It’s sufficient for daily use and to prepare a card for a new shoot.
Low-Level Format (or Full Format): This is a more thorough process that erases all data from the card’s memory, taking longer. It is recommended to perform a low-level format when you first get a new card, when the card’s performance has slowed down, or when you are experiencing card errors.
If your camera is unable to format an SD card, what should you do?
When your camera is unable to format an SD card, the instructions listed below can be helpful.
- Make sure that the SD card is properly placed into the camera slot.
- Verify whether the SD card lock is enabled by looking at the write-protection status.
- If required, turn off the security.
- The first step in dealing with an unformatted SD card is to format it on your computer before inserting it into the camera.
- To determine whether the issue is with the card or the camera system, insert a new SD card.
- By updating your camera’s firmware, you can make sure that different parts work together.
- To get rid of dust and debris, gently wipe the SD card contact points using a sanitized microfiber cloth.
- To find problems and damaged sectors, run disk management checks on your PC.
- If none of the aforementioned methods resolve the issue, a damaged SD card should be replaced with a new one.
Crucial hints for successfully formatting a SD card in camera
Many people quickly format their SD cards, which either causes them to become worthless or results in the loss of their data. Therefore, you must adhere to the advice provided below if you wish to format your SD card successfully and without any problems.
Before conducting a format, it is essential to ensure that all important data is secure.
To ensure the best compatibility, camera users should choose the integrated formatting tool.
It is preferable to keep the number of times you switch your SD card between devices to a minimum.
- Using SD cards of superior quality helps prevent errors. Always make prudent investments.
- Maintaining a high level of performance on your SD card can be achieved through periodic formatting.
- The camera’s battery needs to be completely charged before formatting can begin.
- Because it can cause file corruption, it is usually best to avoid stopping or canceling the formatting process.
- Because the speed class designation on the SD card will guarantee operational fluency, buy one with the right characteristics.
- SD cards should be protected from physical damage by using protective cases.
- Before making a purchase, check the manufacturer’s recommended brands for your SD card device.
FAQs
How can the SD card in a Canon camera be formatted?
When you insert an SD card into a camera, you can see a menu, choose Format Card, confirm the action, and let the process be completed.
How should my outdoor security camera’s SD card be formatted?
Inserting the SD card, using an app or client to access the camera’s settings, selecting “Storage,” selecting “Format,” and authenticating are the steps involved in formatting an SD card for outdoor security cameras.
What occurs when the Reolink SD card is full?
A Reolink SD card automatically overwrites the oldest recordings to store the fresh footage when it reaches full capacity.
Conclusion: Format SD Card in Camera
Proper SD card formatting prevents camera issues and ensures optimal performance. Efficiency can be increased by using a DSLR, trail cam, or security camera and following the proper procedures. If formatting problems arise, troubleshooting techniques will resolve common concerns.
We hope that you now understand Format SD Card in Camera for both DSLRs and security cameras after reading this guide. Leave a comment below with your ideas and experiences!