
When purchasing a new camera, camera straps are typically regarded as an afterthought. Perhaps it’s because almost every camera supplied by most manufacturers comes with How to Attach a Camera Strap. The drawback of purchasing a strap from your camera manufacturer is that it will almost certainly be adorned with gaudy advertisements. Imagine NASCAR drivers, and you’ll understand.
It’s a crucial piece of gear, regardless of whether you choose the one that came with your camera or something else. I’ll walk you through the process of correctly fastening your camera strap to help you get started. Although it may seem easy, there is actually a better method than most people realize.
In this article, we’ll go over how to fasten your Canon camera strap in this post. The steps are the same whether you have a mirrorless camera from Sony or Nikon. These simple procedures can also be used for a three-point slinger or hand-grip camera strap . Even though these procedures might appear time-consuming, they are necessary to guarantee that your camera is as safe as possible.
How To Attach A Camera Strap
It hurts to attach a stock camera strap to a camera, whether it’s new or old. It’s delicate and mostly meant to be done just once. But far too frequently, we have to take off the camera strap in order to set it on a tripod or put one on the camera.
Here are the steps to attach a Canon camera strap, Nikon neck strap, or Sony strap:
- Step 1: Prepare your camera
- Step 2: Prepare the camera strap
- Step 3: Thread the strap onto the lug
- Step 4: To secure the strap, use the plastic buckle and sleeve.
- Step 5: Adjust the strap length
- Step 6: Check for comfort
Step 1: Prepare Your Camera
Before you begin strapping your Canon, Nikon, or Sony camera, it is important to have your camera ready for the job. To safeguard the sensor, take off any lenses that are already on the camera and replace the body cap. Take off any other add-ons, like battery grips, wireless triggers, and flash units.
Make sure the camera lugs are clean and compatible with the new straps before removing the old one if you are changing it. Larger cameras have a solid metal staple ‘on each side, although lugs can take many different forms. Certain smaller cameras only have tiny lugs that accept a threaded strap or a tiny thread pass-through.
Position the camera in front of you on a sturdy work surface, like a desk or table. The dangling strap will tangle on other objects or knock stuff off your table if the work surface is cluttered.
Step 2: Prepare the camera strap
Prepare your strap before securing it to your Sony, Nikon, or Canon camera. Both ends of the neck and shoulder camera straps are made of nylon. A rubber or plastic loop that resembles a tiny sleeve is fastened to each nylon strap along with a buckle. Pull the loose end of the strap through the sleeve to unbuckle it. T
Before you begin, do this on both ends of the camera strap. It’s likely that a wrist strap you’re working with will just have one nylon strap. To get ready, you still need to unbuckle the nylon strap. Whether this procedure is done on a shoulder strap, neck strap, or wrist strap, the nylon end will be open and ready to thread into the camera lug.
Step 3: Thread the strap onto the lug
It is crucial to arrange the strap so that it is facing the correct direction while the camera is positioned upright on the work surface. The majority of camera straps have two sides: a top side that typically features brand logos and a lower side that offers more comfort padding.
Typically, the nylon strap’s buckle is oriented away from the camera. Through the camera lug, insert one end of the nylon strap. Double the nylon strap back to form a loop around the camera lug.
Step 4: To secure the strap, use the plastic buckle and sleeve.
Feed the nylon strap through the buckle to follow the portion that has previously been threaded through. Make sure the nylon thread is firmly in place and doesn’t come loose from the buckle. To keep the loose end of the nylon strap from flying around, pass it through the rubber sleeve. To secure the loose end, you can move the rubber sleeve up and down the strap as necessary.
To keep the loose end from catching on objects while on a shoot, we advise not leaving too much of it visible or protruding from the buckle. Repeat this procedure on the other end of the shoulder strap or cross-body strap if you’re attaching it to a Canon, Nikon, or Sony camera.
Step 5: Adjust the strap length
It’s time to change the length of the camera strap now that both ends are firmly fastened to the camera lugs. This step guarantees that the neck or shoulder strap has an identical amount of nylon strap on both sides.
Additionally, it is to make sure that there is enough nylon strap on both sides that feeds into the buckle. Over time, they may slip out a little; therefore, it’s important to have more than enough strap passing through each buckle. The last thing you want is for the strap to suddenly come loose from the buckle. Using just the strap, raise the camera weight off the tabletop while holding the strap in one hand.
To guarantee that the strap fits the lugs and buckles properly, proceed with caution. Put the camera back down gently and follow the previous instructions if it seems like the strap is slipping.
Step 6: Check for comfort
It’s time to check the camera’s comfort now that the cross-body or wrist strap has been firmly attached. Reinstalling your most utilized lens on the camera is what we advise. Put on your battery grip and speedlight if you usually use them.
Put your hand through the loop of the wrist strap and tighten it if you’re using one. Make sure the nylon strap between your camera and the wrist loop is comfortable and long enough while you are holding your camera.
Feel it over your neck, over your shoulder, or all over your body to get a sense of its weight, balance, and feel. You can adjust the length of the camera strap to your preference and comfort level by slipping the nylon strap through the buckle on either side.
It will be very difficult to comfortably hold the camera up to your eye if the strap is too short. If the strap is excessively long, the camera will hang out of reach and keep bumping into your body. To make sure the length is completely comfortable, test the camera with the strap attached in a variety of well-known shooting positions.
Obtain the Best Strap with the Highest Level of Security
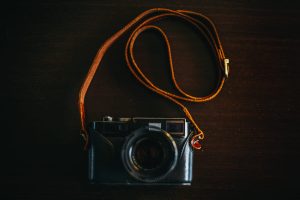
Without a doubt, the aforementioned procedures are tiresome, and a subpar strap like the one shown above may cause tangles. We at Lucky Straps believed that there might be a more effective method of connecting your camera strap to your camera.
As it turns out, there is undoubtedly a more efficient method that saves you time and trouble when attaching a camera strap.
How to Use Split Rings to Attach a Camera Strap
Attaching a camera strap with split rings is quick and simple. Follow these directions for a snug and comfortable fit.
Step 1: Find the Points of Attachment
Find the small metal eyelets (lugs) on your camera’s sides. The split rings will be attached to these places.
Step 2: Adjust the Strap
For straps that can be adjusted, place the adjustable mechanism on the front of your body for convenient access if you intend to wear it sling-style.
Step 3: Split Ring Opening
To pry open a tiny hole in the metal split ring, use your thumbnail or a little flat instrument. Avoid opening the ring too much, as this could cause it to flex or break.
Step 4: Connect the camera to the split ring.
Thread the open split ring through the lug of the camera and turn it until it slides all the way through and locks into place.
Step 5: Do the same with the opposite side.
Repeat the previous process to attach the second split ring to the other side of your camera. Watch out for surprises!
Your camera strap is now ready for use after being firmly fastened with split rings.
Best Advice:
Always remove the split ring from the camera rather than the strap if you ever need to remove it. Make sure to take the ring off of the camera before pulling the leather strap through the split ring, as this can harm the leather.
How to Install a Camera Strap?
Find the strap lugs on either side of the camera body before securing a strap. Next, make sure the strap is not twisted by passing one end through one lug. The strap’s opposite end should then be inserted through the other lug. Lastly, before using the camera, make sure the strap is well fastened and adjust its length to your liking.
1. Camera Strap Types
There are only a few uncomplicated steps involved in installing a camera strap. First, find your camera’s strap lugs. Usually, these can be found on either side of the camera body. Next, fasten the camera strap’s connectors or split rings to the strap lugs.
To keep the strap from coming free, make sure the split rings are fastened firmly. After the split rings are fastened, change the strap’s length to suit your tastes. Certain camera straps have buckles or sliders that can be adjusted to change the length for a more comfortable fit. Lastly, before using your camera, make sure the strap is fastened firmly.
Numerous kinds of camera straps are available, each made to accommodate various shooting methods and tastes. Many photographers like the conventional neck strap because it provides a convenient and easy way to wear a camera around the neck.
An additional choice is the sling strap, which more evenly distributes the weight over the body and provides rapid and simple access to the camera. For small cameras or photographers who want to always have their camera close at hand, wrist straps are perfect. They are also appropriate for lengthy shooting sessions or large camera setups because they have harness-style straps that offer additional stability and support.
Nowadays, a lot of photographers choose straps with extra features like quick-release mechanisms or anti-slip padding and constructed of pleasant and long-lasting materials like leather or neoprene.
Additionally, the popularity of personalized and customizable camera straps has grown, enabling photographers to use their choice of strap to show their own style and uniqueness. We can anticipate seeing even more creative and useful camera strap designs in the future as the photography business develops more.
2. Attaching to Camera Body
Finding the strap lugs on your camera body is the first step in installing a camera strap. Typically, these are found on either side of the camera.
Make sure the strap is properly fixed and free of tangles or twists after it has been applied.
You should always refer to the camera’s manual for detailed instructions because different camera models may have somewhat different strap attachment techniques.
From a modern standpoint, photographers can now choose from a variety of camera strap styles, such as quick-release systems and sling-style straps, which provide greater convenience and versatility. Furthermore, some straps are made with ergonomic elements to improve comfort and weight distribution during extended shooting sessions.
All things considered, attaching a camera strap is an easy procedure that can both protect your camera and make taking pictures more convenient.
3. Adjusting Length and Position
A camera strap’s “Adjusting Length and Position” is a crucial step in guaranteeing both comfort and functionality when using your camera. Use these procedures to install a camera strap:
- Fasten the strap to the camera: The majority of cameras include tiny metal eyelets or loops on either side. After passing the strap’s end through these loops, attach it with the included fasteners.
- Modify the length: Once the strap is secured, adjust its length to your liking. This will depend on your height and preferred camera-carrying technique. While some people prefer the camera higher on their chest, others prefer it to hang at their waist.
- Adjust the padding: Make sure the camera strap is comfortably resting on your shoulder if it has any padding. This will lessen the pressure on your shoulders and neck by distributing the camera’s weight.
- Check the fit: Wear the camera over your neck or shoulder to check the fit after adjusting the length and position. Before you go out to shoot, make sure it feels safe and cozy.
From a contemporary standpoint, there are now several varieties of camera straps available, such as wrist, cross-body, and sling-style straps, each with unique advantages in terms of accessibility and comfort.
Furthermore, some straps have quick-release mechanisms that make it simple to detach them, which makes them more practical for photographers who are constantly on the go. For extra comfort during extended shooting sessions, it’s also critical to take into account the strap’s material, which can range from conventional leather to contemporary, breathable textiles.
4. Securing Camera for Safety
A camera strap must be installed correctly in order to secure your camera for safety. This will lessen the possibility of unintentional drops and harm to your priceless items. To mount a camera strap, follow these steps:
- Locate the attachment points: The majority of cameras come with built-in camera strap attachment points. These are often found on the camera body’s top or sides. Additionally, some cameras could include hand strap attachment points on the bottom.
- Insert the strap into the attachment points: After identifying the attachment locations, insert the camera strap’s ends into them. Verify that the strap is well fastened and that there is no chance of it coming loose.
- Change the length: Since most camera straps are adjustable, you can change the length to suit your needs. Make sure the strap fits comfortably, gives you a firm grip, and lets you access your camera with ease.
- Test the strap: To make sure the camera strap is firmly fastened, gently tug on it after installation. To make sure the strap can hold the camera without any problems, you can also test its weight.
- Check the strap frequently. The strap and its attachment points may deteriorate with time. To make sure the strap and the connection points are still in good shape and secure, it’s crucial to periodically inspect them.
From a contemporary standpoint, there are currently several kinds of camera straps that offer varying degrees of comfort and security, such as sling straps, wrist straps, and harness systems.
Furthermore, some straps have quick-release mechanisms that make it simple to detach them, which makes them more practical for photographers who are constantly on the go.
Conclusion: How To Attach A Camera Strap
In order to provide the best quick-release camera strap system that is quick and easy for photographers and videographers, we at Lucky Straps have mastered the camera strap.
It is a misery to constantly take off the factory-standard camera strap that comes with your Canon, Nikon, Sony, Fujifilm, or Panasonic camera. If you wish to mount your camera on a gimbal, a tripod, or an underwater housing, you might want to take off your strap. You probably won’t have much time.
Get the greatest new quick-release camera strap system from Lucky Straps to avoid the trouble of repeating all the previous stages. That’s all. After that, you can use your camera without the strap on a gimbal, tripod, monopod, or underwater housing.
Recent Posts
Have you observed that both novice and seasoned photographers are showing a revived interest in film photography? Choosing their first film cameras can be overwhelming for many people due...
The inexpensive How to use disposable camera provides a welcome, sentimental look back at simpler times in a time when digital photography is king. With film already loaded, these small,...
One thought on “How To Attach A Camera Strap: A Beginner’s Guide”